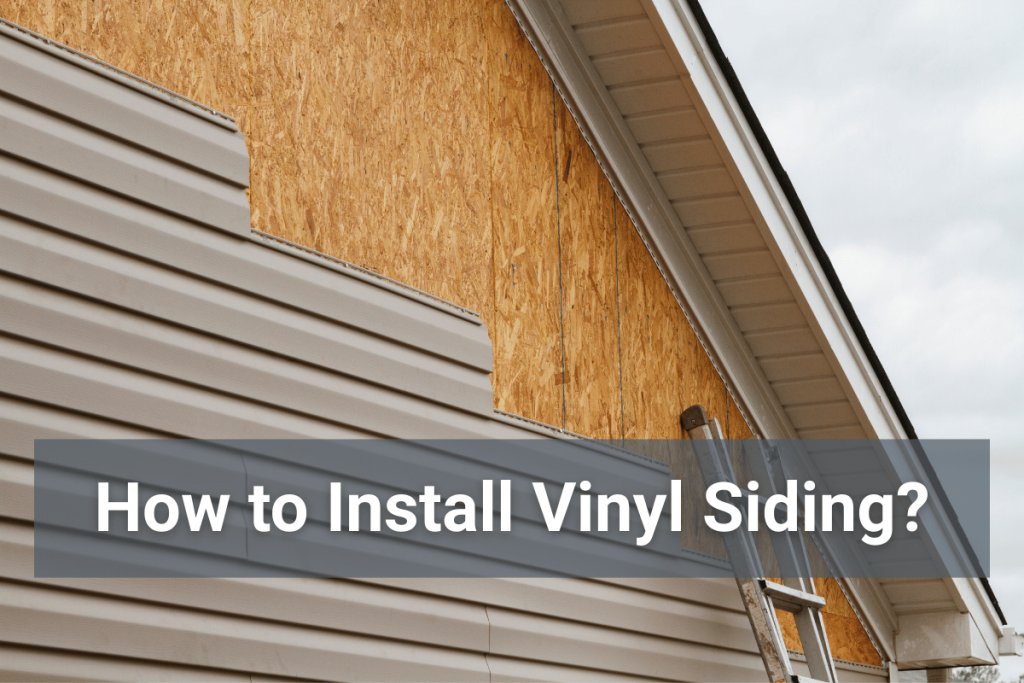
How to Install Vinyl Siding: Complete Step-by-Step Guide for Homeowners
Vinyl siding is one of the most popular exterior materials used on homes today. It is durable, affordable, and requires very little maintenance compared to other exterior options. Many homeowners choose this siding material because it protects the house from weather while improving curb appeal.
Because of its popularity, many people ask how to install vinyl siding and whether they should attempt siding installation themselves or hire professionals. Installing vinyl siding correctly requires careful planning, the right accessories and tools, and attention to detail. If siding panels are not installed properly, the house may experience moisture issues, energy loss, or structural damage over time.
This guide explains how to install vinyl siding using a step vinyl siding installation process that helps homeowners prepare the wall surface, find the right materials, and complete installation safely. The guide also explains when it may be better to hire professionals for installing vinyl siding to protect your home.
What Is Vinyl Siding and Why Is It So Popular for Homes?
Vinyl siding is a durable exterior siding material designed to protect the outside wall of a house while improving the appearance of your home. It is made from PVC and engineered to resist moisture, insects, and temperature changes.
Homeowners across Washington often install siding on renovation and construction projects because it offers reliable protection with minimal maintenance.
Key Benefits of Vinyl Siding
Affordable exterior siding option
Vinyl siding is typically more affordable than wood, brick, or fiber cement siding. This makes it a practical upgrade for homeowners who want to improve their house exterior without excessive costs.
Long lifespan and durability
Properly installed siding can last decades. High quality vinyl siding panels resist cracking, moisture exposure, and environmental wear.
Low maintenance requirements
Unlike wood siding, vinyl siding does not require frequent repainting. Cleaning the siding panels occasionally helps maintain the appearance of your home.
Wide range of colors and textures
Vinyl siding panels are available in many styles, allowing homeowners to choose colors and textures that complement their house design.
Weather and moisture resistance
When siding installation is completed properly with correct channel pieces and flashing, it protects the wall structure of your home from rain and moisture.
Where Vinyl Siding Is Commonly Used
Vinyl siding is commonly installed in many types of residential projects.
• Residential house construction
• Renovation and exterior upgrades
• New construction projects
Many homeowners install siding as part of exterior renovation work to improve insulation and protect the sheathing underneath the siding panels.
Tools and Materials Needed to Install Vinyl Siding
Before beginning the siding installation process, homeowners must prepare the correct tools and materials. Estimating materials correctly is important so the installation process runs smoothly.
Essential Tools for Vinyl Siding Installation
• Tape measure
• Level
• Utility knife or siding cutter
• Circular saw with fine tooth blade
• Hammer or nail gun
• Chalk line
• Tin snips
These tools allow installers to measure panels, cut siding pieces accurately, and nail panels properly during installation.
Vinyl Siding Materials Checklist
• Vinyl siding panels
• Starter strip
• J channel
• Corner posts
• Utility trim
• House wrap or moisture barrier
• Nails designed for siding installation
• Soffit and fascia accessories when required
Having the proper accessories ensures siding installation is secure and weather resistant.
Step Vinyl Siding Installation Process for Your Home
Understanding how to install vinyl siding requires following a clear step vinyl siding installation process that ensures the siding panels align correctly and protect the wall structure.
Step 1: Prepare the Exterior Wall Surface
Preparation is essential before installing vinyl siding.
First remove old siding from the house if necessary. Removing old siding allows installers to inspect the wall sheathing and structural framing behind the siding.
Check the sheathing for damage, moisture, or rot. If damaged sheathing is found, repair it before continuing installation.
After inspection, install house wrap to protect the wall surface and improve moisture control. Preparing the wall correctly ensures the siding panels perform properly for many years.
Step 2: Install the Starter Strip
The starter strip supports the first row of siding panels.
Locate the starting point along the bottom edge of the wall and mark a straight level line across the side of the house. The starter strip must remain level because every siding panel installed above it will follow the same alignment.
Secure the starter strip using nails placed through the nail slots. Leave slight spacing so the strip can move with temperature changes.
Step 3: Install Corner Posts and Trim Pieces
Corner posts provide structure for the siding panels at the edges of the house.
Install both inside and outside corner posts before attaching the siding panels. Corner posts guide the siding panels and help keep the installation straight.
Next install J channel pieces around windows, door frames, and the window area. The channel allows siding panels to slide into place while leaving space for expansion gaps.
Step 4: Begin Installing the First Row of Vinyl Siding Panels
The first siding panel locks directly into the starter strip.
Place the panel into the starter strip and gently snap it into position. Nail the panel through the nail slots located at the top edge of the siding panel.
Do not drive the nail too tightly. Leaving space allows the siding panels to move during temperature changes.
Step 5: Continue Installing Additional Rows
After the first row is secure, continue installing siding panels upward along the wall.
Each panel should overlap the previous panel slightly to prevent water from entering behind the siding.
Install siding across the side of the house while maintaining consistent expansion gaps between panels. This prevents buckling and helps the siding move naturally with temperature changes.
Step 6: Install Panels Around Windows and Doors
Installing vinyl siding around the window area requires careful measurement.
Measure the distance between the window frame and surrounding siding pieces. Cut the siding panels using tin snips or a siding cutter.
Slide the cut panel into the J channel surrounding the window area. Leave small expansion gaps to prevent stress on the siding panels.
Step 7: Install the Top Row and Utility Trim
The final siding row sits near the roof line of the house.
Cut the final panel to the correct height and insert it into the utility trim. Utility trim secures the panel while creating a clean finished appearance.
Properly installed utility trim helps lock the siding panels in place and protects the top section of the wall near the roof and soffit.
Installing Vinyl Siding on Homes in Washington Climate
Washington weather conditions require special attention during siding installation.
Weather Considerations in Washington
• Moisture management
• Rain exposure
• Temperature expansion and contraction
Because homes in Washington experience frequent rain, installers must protect the wall sheathing carefully and ensure the siding panels allow moisture to drain away from the wall.
Best Practices for Long Lasting Siding in Washington
• Install proper flashing around windows and roof edges
• Use breathable house wrap over the sheathing
• Ensure soffit and fascia ventilation around roof lines
• Choose high quality vinyl siding panels
Following these practices helps siding installations perform well in Washington cities such as Seattle, Tacoma, Bellevue, Everett, Renton, Kent, Auburn, and Redmond.
Common Mistakes to Avoid When Installing Vinyl Siding
Even small mistakes during installing vinyl siding can cause major issues.
Nailing Too Tight
Vinyl siding expands and contracts. Driving the nail too tightly prevents the panel from moving properly.
Poor Wall Preparation
If installers fail to prepare the wall and inspect the sheathing, siding panels may appear uneven across the side of the house.
Incorrect Panel Overlaps
Incorrect overlapping of siding panels can allow water to reach the wall behind the siding.
Ignoring Expansion Gaps
Expansion gaps allow the siding to move naturally with changing temperatures.
Can You Install Vinyl Siding Yourself or Should You Hire a Professional?
Homeowners researching how to install vinyl siding often consider DIY installation.
DIY Vinyl Siding Installation Pros
• Lower upfront cost
• Personal satisfaction
• Flexible project timing
DIY Installation Challenges
• Precision cutting of siding panels required
• Weatherproofing mistakes can damage your home
• Large time commitment for installing vinyl siding
• Working safely near the roof and soffit areas
Professional installation helps reduce errors and protects the structure of your house.
How Much Does Vinyl Siding Installation Cost in Washington?
Understanding siding installation costs helps homeowners estimate project budgets.
Average Vinyl Siding Installation Cost
• Materials: $4 to $8 per sq ft
• Labor: $3 to $7 per sq ft
• Total Installed Cost: $7 to $15 per sq ft
Costs may vary depending on the size of the house and the complexity of the siding installation.
Factors That Affect Vinyl Siding Installation Cost
• Home size and design complexity
• Type of vinyl siding panels selected
• Removal of old siding
• Trim, fascia, and soffit work
• Labor availability in Washington
Homes located in Seattle or Bellevue may experience higher installation costs due to regional labor demand.
What Are the Signs Your Home Needs New Vinyl Siding?
Homeowners should look for several warning signs that indicate siding replacement may be necessary.
• Cracks or warped siding panels
• Loose siding pieces
• Mold or moisture damage behind siding
• Higher energy bills due to poor insulation
• Faded or brittle siding materials
These signs suggest the siding is no longer protecting the wall structure effectively.
Why Choose Professional Vinyl Siding Installation Services?
Professional installation offers several benefits compared to DIY projects.
Advantages of Hiring Professionals
• Correct siding installation techniques
• Faster project completion
• Manufacturer warranty protection
• Compliance with local building codes
How Professional Installation Protects Your Home
• Better resistance to rain and moisture
• Longer siding lifespan
• Improved exterior appearance
Professional installers ensure the siding panels, corner posts, utility trim, and channel pieces all work together to protect the house structure.
Why Homeowners Trust Washington Sequoia Roofing for Exterior Projects
Washington Sequoia Roofing helps homeowners improve and protect their properties with professional exterior services. Our team understands the siding installation process and works carefully to ensure the wall structure and sheathing remain protected.
We use high quality siding materials, reliable installation techniques, and proper accessories including starter strips, corner posts, trim pieces, and soffit components.
Our team focuses on delivering durable results while maintaining clear communication throughout the project.
Areas We Serve in Washington
Washington Sequoia Roofing proudly provides siding installation and exterior improvement services throughout Washington. Our team serves homeowners in Seattle, Tacoma, Bellevue, Everett, Renton, Kent, Federal Way, Auburn, Redmond, and surrounding communities.
Our professionals understand local building requirements and install siding systems designed to handle the Pacific Northwest climate.
Frequently Asked Questions About Vinyl Siding Installation
How long does vinyl siding installation take?
Most siding installation projects take three to seven days depending on the size of the house.
How long does vinyl siding last?
High quality vinyl siding can last between 20 and 40 years with proper installation and maintenance.
Does vinyl siding improve home value?
Yes. New siding improves curb appeal and protects the structure of your home.
Can vinyl siding be installed over existing siding?
In some cases siding can be installed over old siding, but removing old siding allows professionals to inspect the wall and sheathing first.
What maintenance does vinyl siding require?
Vinyl siding requires minimal maintenance. Cleaning the siding panels occasionally helps maintain the appearance of your home.
Get Professional Vinyl Siding Installation in Washington
If you are researching how to install vinyl siding, it is important to understand that proper installation protects your home from weather damage and structural problems. While some homeowners attempt installing vinyl siding themselves, professional installation ensures the siding panels, corner posts, and trim pieces are installed correctly.
Washington Sequoia Roofing provides reliable siding installation services designed for homes throughout Washington. Our experienced team uses proven techniques and quality materials to ensure your siding performs well for many years.
Whether you need new siding installation, exterior upgrades, or professional inspections, Washington Sequoia Roofing is ready to help homeowners throughout Seattle, Tacoma, Bellevue, Everett, Renton, Kent, Auburn, and Redmond. Contact our team today to schedule a consultation and protect your home with professional siding solutions.
Call today: (206) 488-0168